Overview
3DNS is winding down operations and will no longer offer domain tokenization services to its users. To ensure your domains remain active beyond September 30, 2026, they must be transferred to NameSilo.
Follow these steps to complete your domain transfer safely
Step 1: Review the Key Information
.png)
1. Read the overview explaining what the transfer means.
2. Understand that this process removes all Web3 features from your domain.
3. Review the lists of what you will keep and what you will lose.
You will keep (Web2):
- Standard DNS management
- Traditional web hosting
- Email service
- Domain forwarding
- Regular registrar features
You will lose (Web3):
- Blockchain integration
- Crypto payment support
- NFT and decentralized hosting
- Smart contract capabilities
4. Click Continue to NameSilo Setup to proceed.
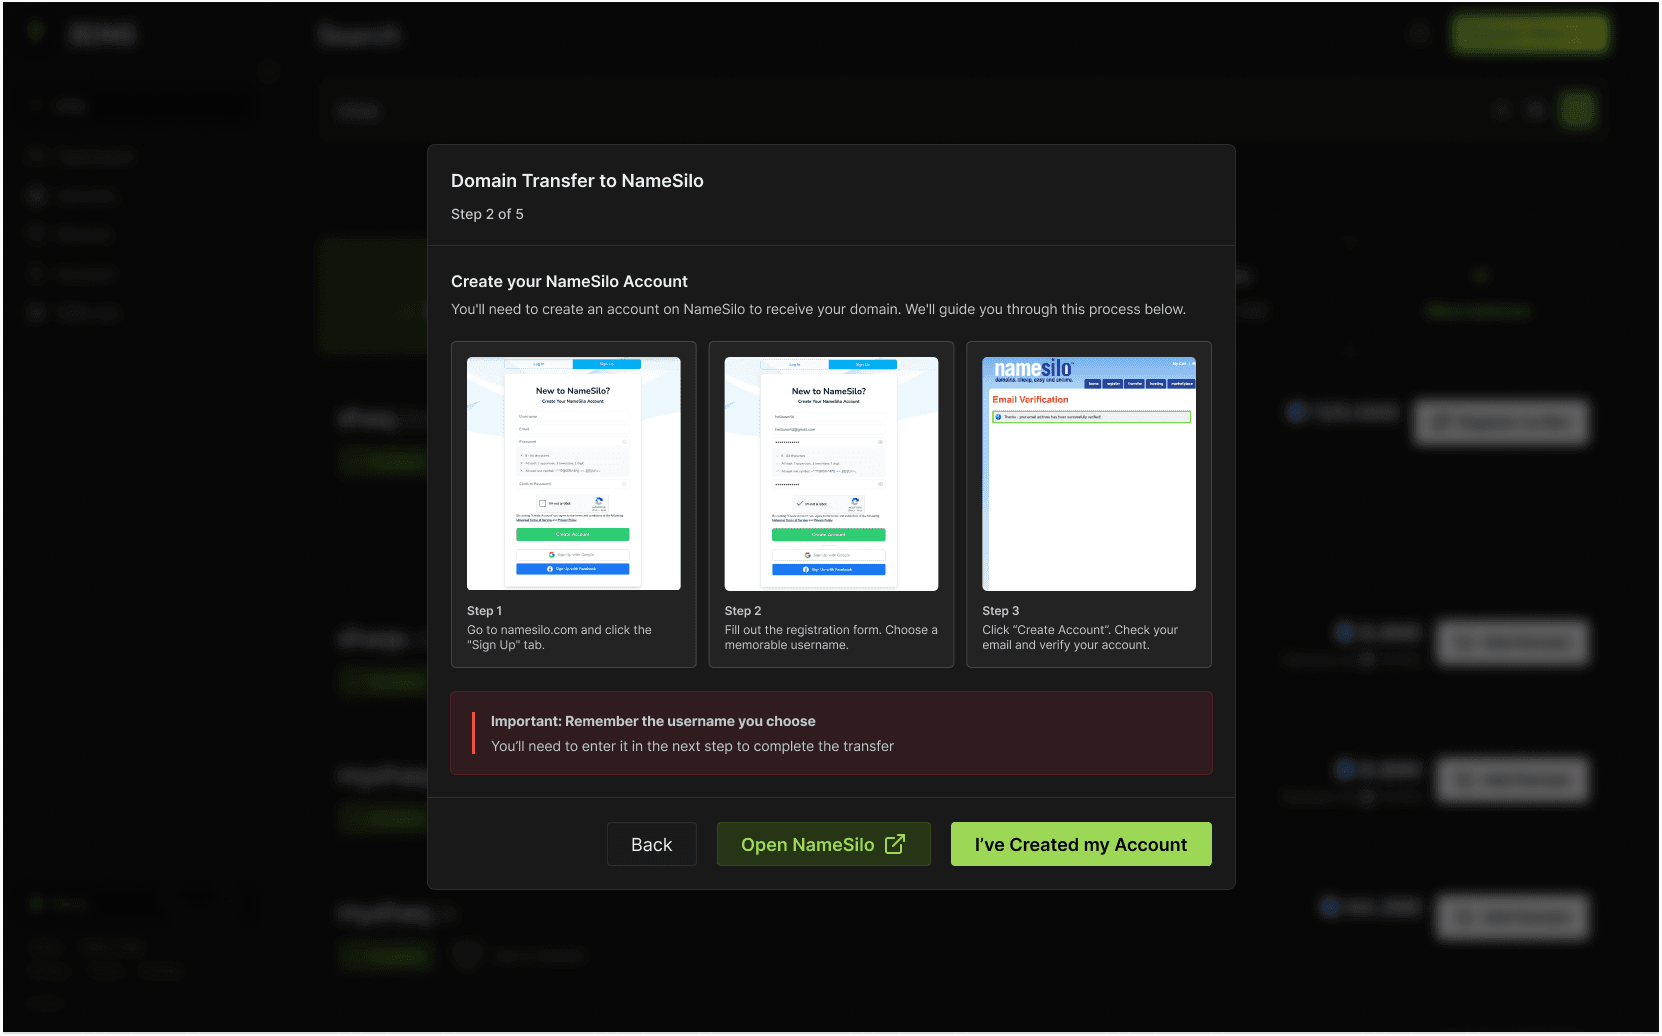
Step 2: Create a NameSilo Account
1. If you do not already have a NameSilo account, click **Open NameSilo**.
2. On NameSilo’s site, click Sign Up.
3. Fill out the registration form and choose a memorable username.
4. Click Create Account, then check your email to verify your account.
5. Once your account is verified, return to 3DNS and click I’ve Created My Account.
Step 3: Select the Domain You Want to Transfer
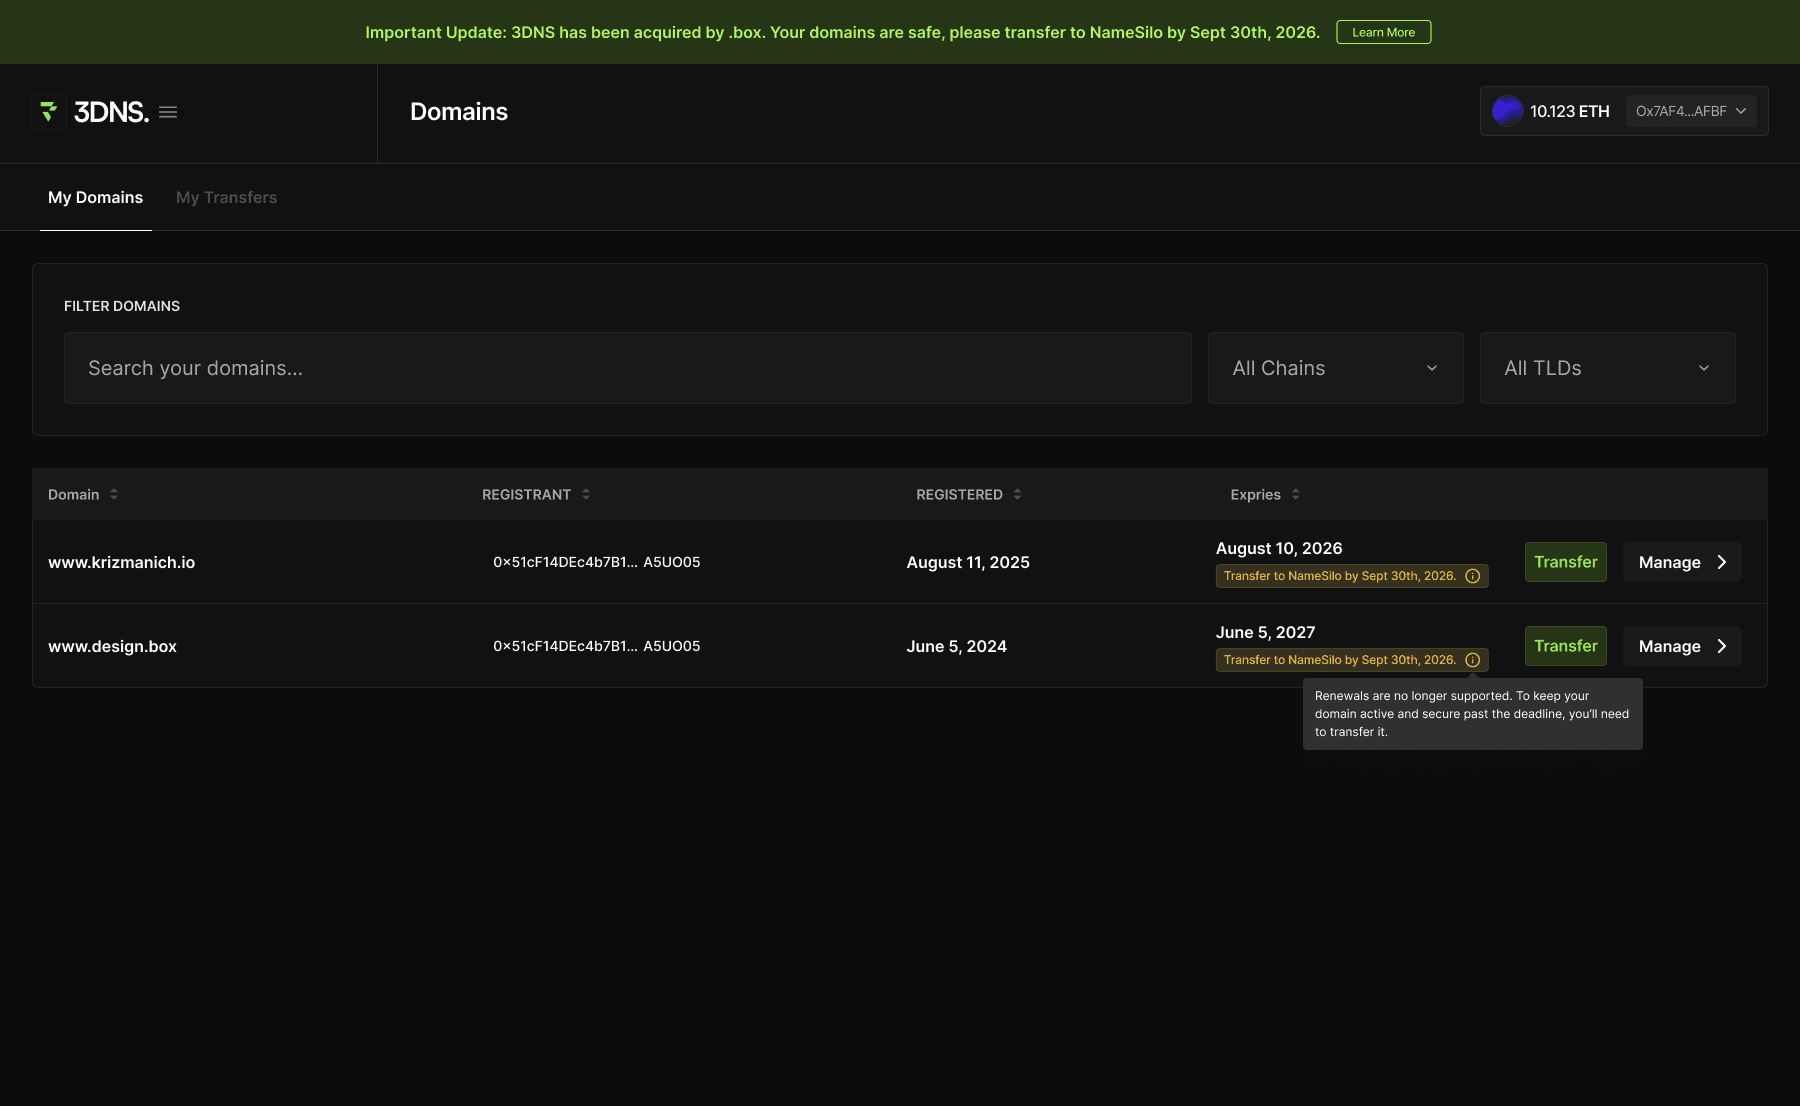
1. In your My Domains tab, find the domain you want to transfer.
2. Check its expiration date** and confirm it needs to be transferred before **September 30, 2026.
3. Click the green Transfer button next to the domain.
4. A new transfer process window will open for that domain.
5. Remember: renewals are no longer supported on 3DNS. To keep your domain active, you must complete this transfer.
Step 4: Confirm Your NameSilo Account
1. After selecting the domain to transfer, 3DNS will prompt you to confirm your NameSilo account setup.
2. Ensure your NameSilo account has been created and verified.
3. Click I’ve Created My Account to proceed to the username validation step.
Step 5: Enter and Validate Your NameSilo Username

1. Enter the username you created on NameSilo.
2. Click Validate Username to confirm your account connection.
3. When validation is successful, you will see the confirmation screen below:
4. Click Continue to proceed to the next step.
Step 6: Select the Domains to Transfer

1. Review the list of domains available for transfer.
2. Select the ones you want to transfer to NameSilo.
3. Review expiration dates and transfer availability indicators.
4. Note that `.box` domains remain managed on my.box and do not need to be transferred.
5. Click Continue to Confirmation once you have selected your domains.
Step 7: Confirm and Transfer
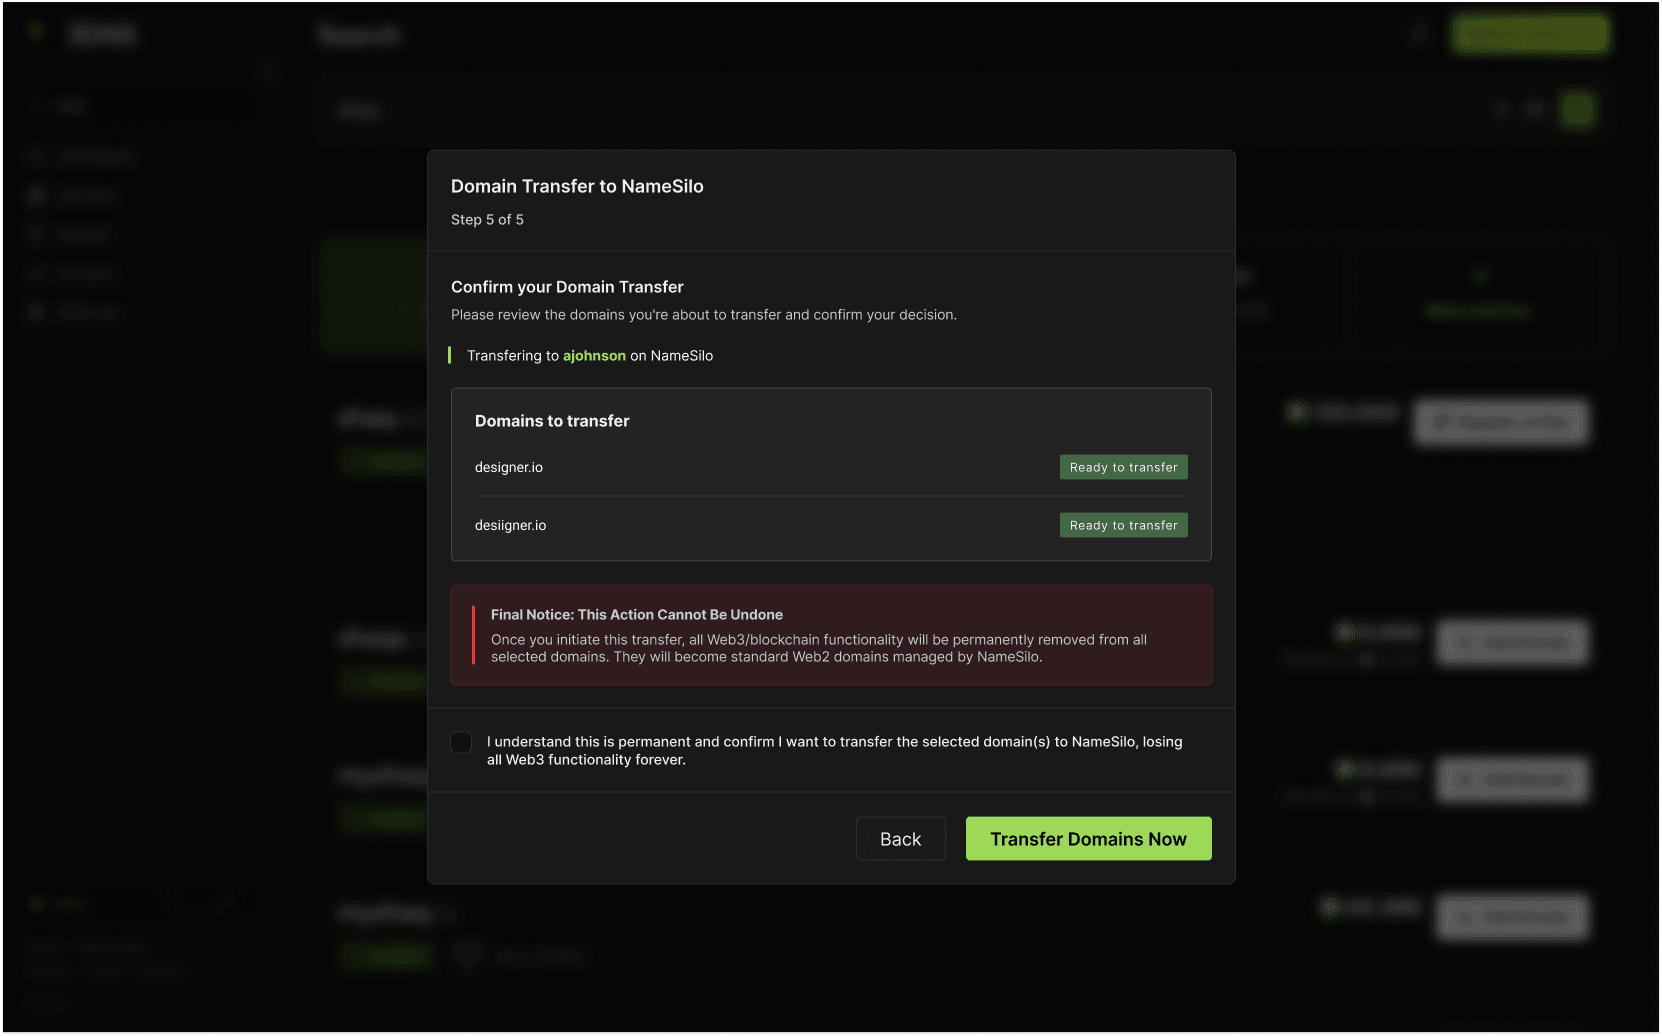
1. Review the confirmation summary.
It includes:
- The NameSilo account you are transferring to
- The list of domains selected for transfer
- A red Final Notice reminding you this action cannot be undone
2. Check the acknowledgment box confirming that you understand Web3 functionality will be permanently removed.
3. Click Transfer Domains Now to finalize the transfer.
Step 8: Transfer Success
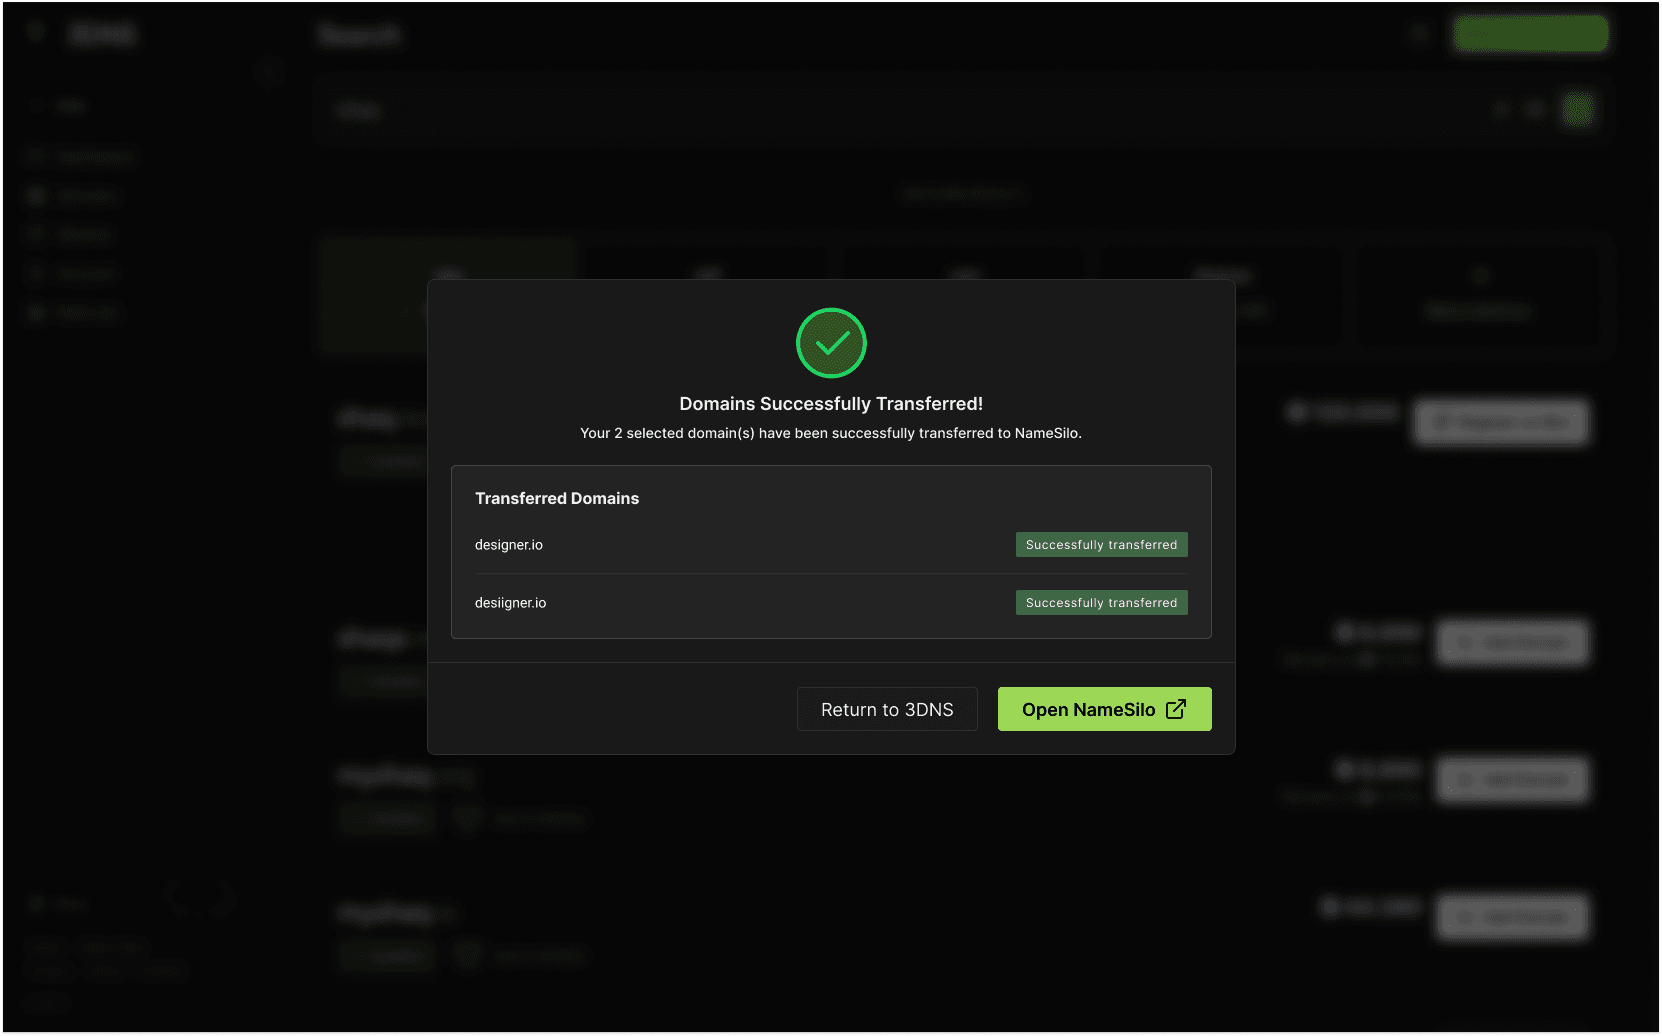
1. Wait for the success confirmation screen.
2. Once complete, your domains will now appear in your NameSilo account.
3. You can manage them at https://www.namesilo.com or click Open NameSilo directly from the success screen.
4. Optionally, click Return to 3DNS if you want to review or transfer additional domains.
Before You Begin
- Transfer your domains before September 30, 2026 to keep them active.
- 3DNS renewals are no longer supported.
- Transferring to NameSilo is required for continued management and renewal access.